So - my sister is moving - again. And while I admire the fortitude
it takes to move across the country once more, I am green with envy
over the possibilities she gets to decorate different homes every couple
years. With that thought in mind, the next few blog posts will be
about making your own home decorations - the (of course) artsy girl way!
While
I admit that just buying your new decorations would be much easier -
and I'm sure Diane would think so after spending hours upon hours
unpacking boxes and cleaning her new home - I just can't get my arms
around spending the money. It could be my inherent frugalness...or I
could
just enjoy the challenge of making something new. Either way, we have
to start somewhere - so let's start with something fun and easy to do.
I
started by asking myself what would make the biggest impact - but look
really artsy/cool. Walls came to mind. Now, I admit the easiest way to
decorate a wall would be to hang some pictures on it - - but where is
the fun in that! Let's make something that tells a story.
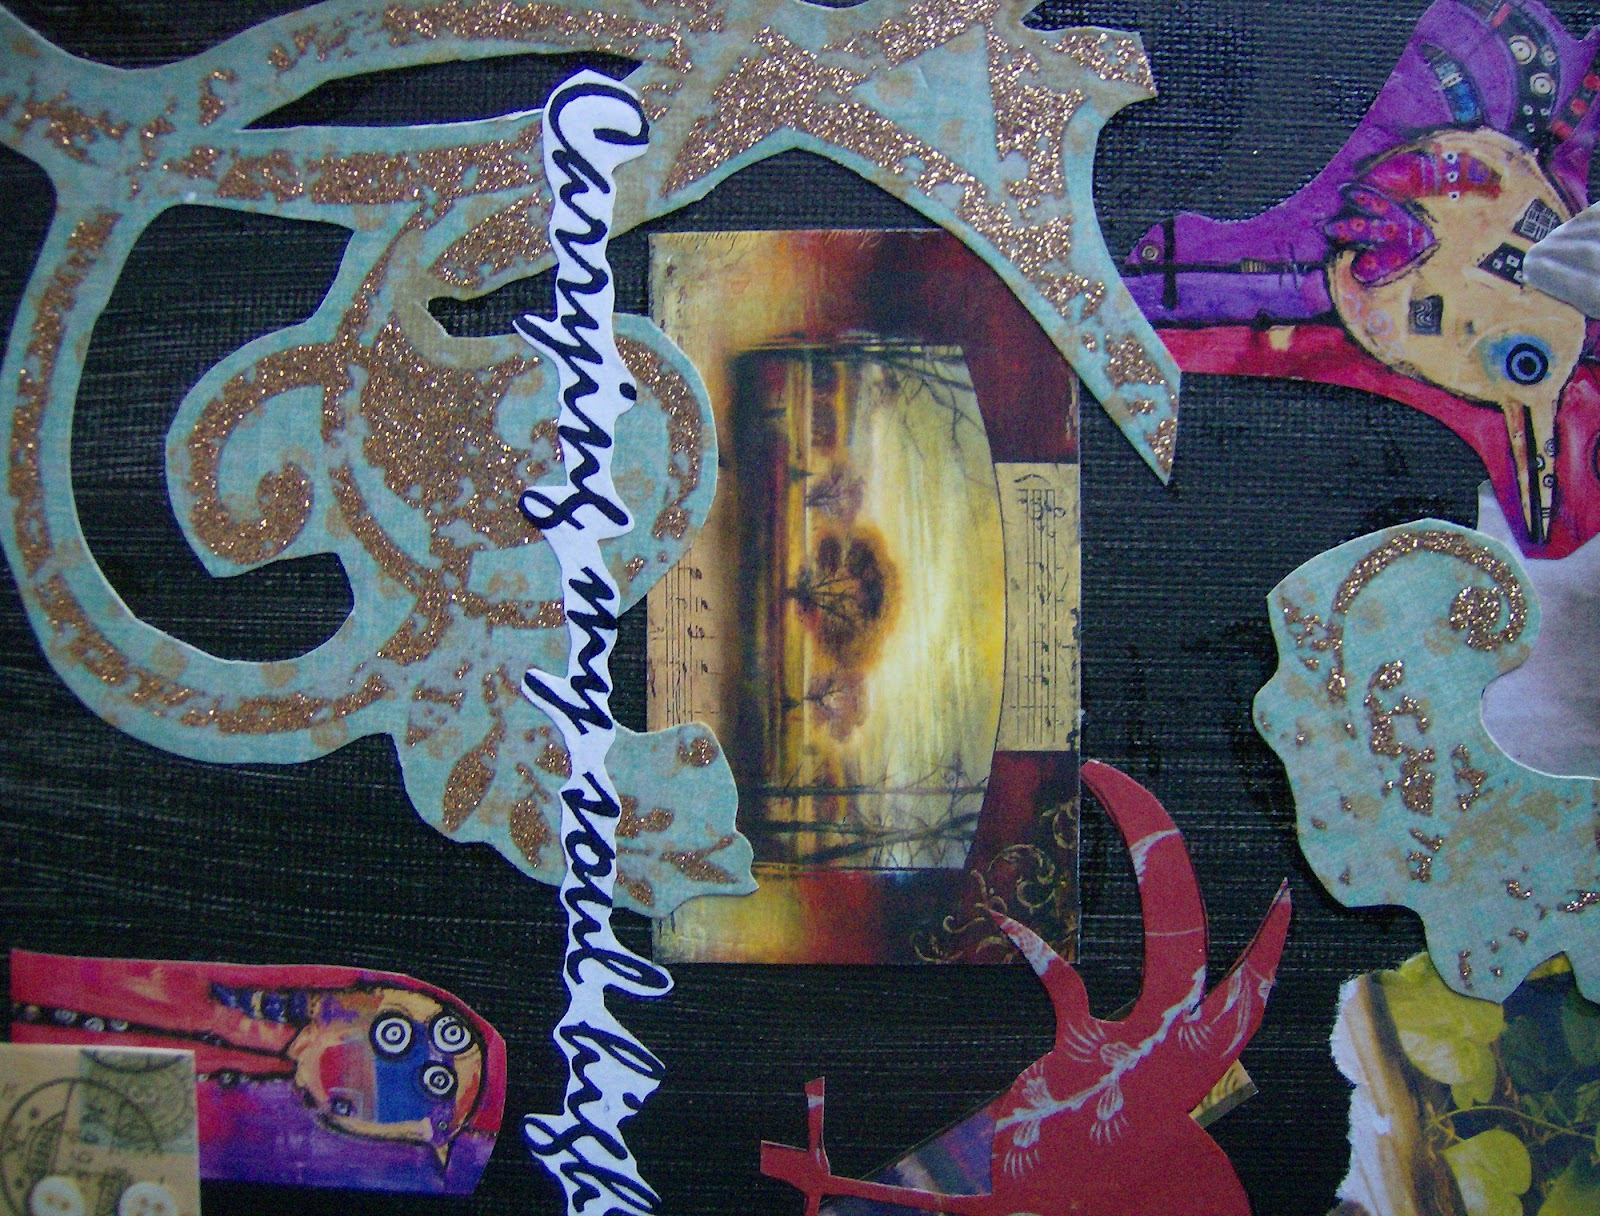
I
started with some pieces of heavy cardboard (used boxes for those of
you who haven't figured it out yet!), that I then cut (with a razor
blade) into irregular shapes. I traced the edge of one piece, onto a
second so that they will fit together like puzzle pieces. I then took
some leftover paint I had laying around and applied a couple of coats to
each piece, making sure it was nice and even.
While
it was drying, I looked
through my boxes of extra pictures, funny cartoons, interesting arty
business cards, etc....anything that looked interesting and that
expressed something about your subject matter. Mine, of course, was all
about me (lol) but you could do (Diane are you listening) each house
that you've been in (hint hint), special trips you've taken or even one
puzzle piece for each member of your family. You choose.
After
the paint was dry, I began to lay out the items in random patterns,
overlaying some, trimming others into odd shapes, anything that suggests
systematic randomness (is that even a phrase?). You get the gist. I
cut out words from old newspapers and magazines to add to my creation.
Once my basic layout was complete - I broke out the Modge Podge and a
sponge brush and started gluing the pieces on the cardboard.
Once
I had the entire piece covered, I let it dry, then put
another thin coat of Modge Podge over the entire piece. I put it aside
to let it dry completely while I worked on the other puzzle pieces.
Once they were all dry, I could really have some fun! What could be
more fun than this you ask? Just wait!
Out
of my magic box of craft supplies came squeeze bottles of dimensional
paint, glitter, flat back rhinestones, googly eyes and a variety of
findings, gear pieces, washers, miniature mirrors and anything else you
could imagine. With my hot glue gun ready to aim, I started with the
paint and drew artistic lines through and around all the puzzle pieces,
connecting them together without the use of glue. I added sparkles with
crystals, rhinestones and glitter on some, with more industrial
hardware on others. My mixed media art pieces took on added dimension.
Way Cool!
So - once the front dried - I wanted
to give
it some added dimension and raise it off the wall. I had some foam
blocks left over from an egg project which I cut and hot glued to the
back of each piece in a number of places, making sure that each piece
was level, but not necessarily even with each other. I hammered little
nails in the wall and slide the foam pieces right over them so that each
puzzle piece appears to float in the air.
Try it - it's a fun project for the whole family - and a definite conversation piece for any room!
~ Dani