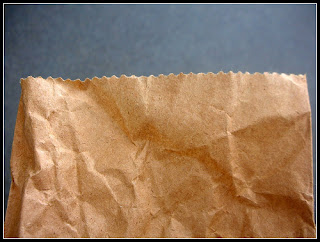
Ok -- so I'm bored with painting
walls. Sponge painting, glazes, stripes, polka dots, clouds you name it
- I've done it. I want something different, that gives texture without
throwing sand at the walls like on some TV shows we all know and obsess
about.
I heard about this technique and
decided to try it. It gives a rich faux leather look to your walls or
whatever you decide to try it on. How, pray tell, do you do that you
might ask? With some thinned out Modge Podge and - wait for it - lunch
bags! Yes, that's right those brown paper sacks we all loved to hate
when children now have a much better use than holding our twinkies, ding
dongs and bologna sandwiches.
Hint - Depending on the size of the space you want to try it on, you can also use brown butcher's
paper.
Start by tearing (that's right tearing)
the paper bags into various sizes, making sure you are only using one
layer of bag. Smooth out each piece, and lay flat, continuing until
you have a selection of sizes and shapes.
Thin
out the Modge Podge using a ratio of 1-1 (water to glue), and stir until
thoroughly mixed. Wipe down the wall or object to remove and dust or
dirt - you want a clean surface.
Cover a
table or flat surface with plastic. Take one piece of brown paper and
apply a smooth, thin coat to the paper. Allow the glue to soak in for a
minute or so. In the meantime - apply a thin coat of glue to your wall
or object. Take your pre-glued paper and apply to the object. I
reserved the pieces with straight edges for the corners and edges of my
project so that it looked finished. Smooth the paper
down, using your sponge or brush to make sure it adheres flat. Any
wrinkles in the paper will create the look of leather wrinkles - so it's
ok if it looks kind of rough but you want to make sure it lays flat.
Continue in this manner, slightly overlapping each piece as you
proceed. Cover the entire area you wish to finish and let dry
completely. Apply an additional thin coat of watered down glue to
seal.
This
is a great effect and really looks like leather! I tried it on a small
piece of leftover drywall first and was pleasantly surprised. I found
that if I slightly crumbled the bag, then flattened it out with my
hands, the leather wrinkles really showed up great and added
dimension.
~ Dani
Image: License

No comments:
Post a Comment